Appendix A — Setting up your machine
This section covers all the steps needed to set up your machine in order to follow the labs sessions. The technological stack used for this module is composed of the following main components:
- Python + libraries: Python is the programming language of choice for this module. Besides regular Python, we will be using a number of libraries that extend Python’s features for specific tasks. These libraries need to be installed, too, before they can be loaded.
- Anaconda: to install and handle all the libraries needed for this module, locking them to specific versions that
Section 3.1 provides a more detailed description of what every component does, and why are they needed.
A.1 Install Anaconda
You will need to install Anaconda distribution your machine if it is not already installed. You can run the following command to see if it is already present in your system:
Terminal
conda --helpIf you get a command not found error, you will need to install Anaconda. You can do so by:
- Download it from the official website: https://www.anaconda.com/download
- Execute the binary you downloaded in previous steps and follow instructions
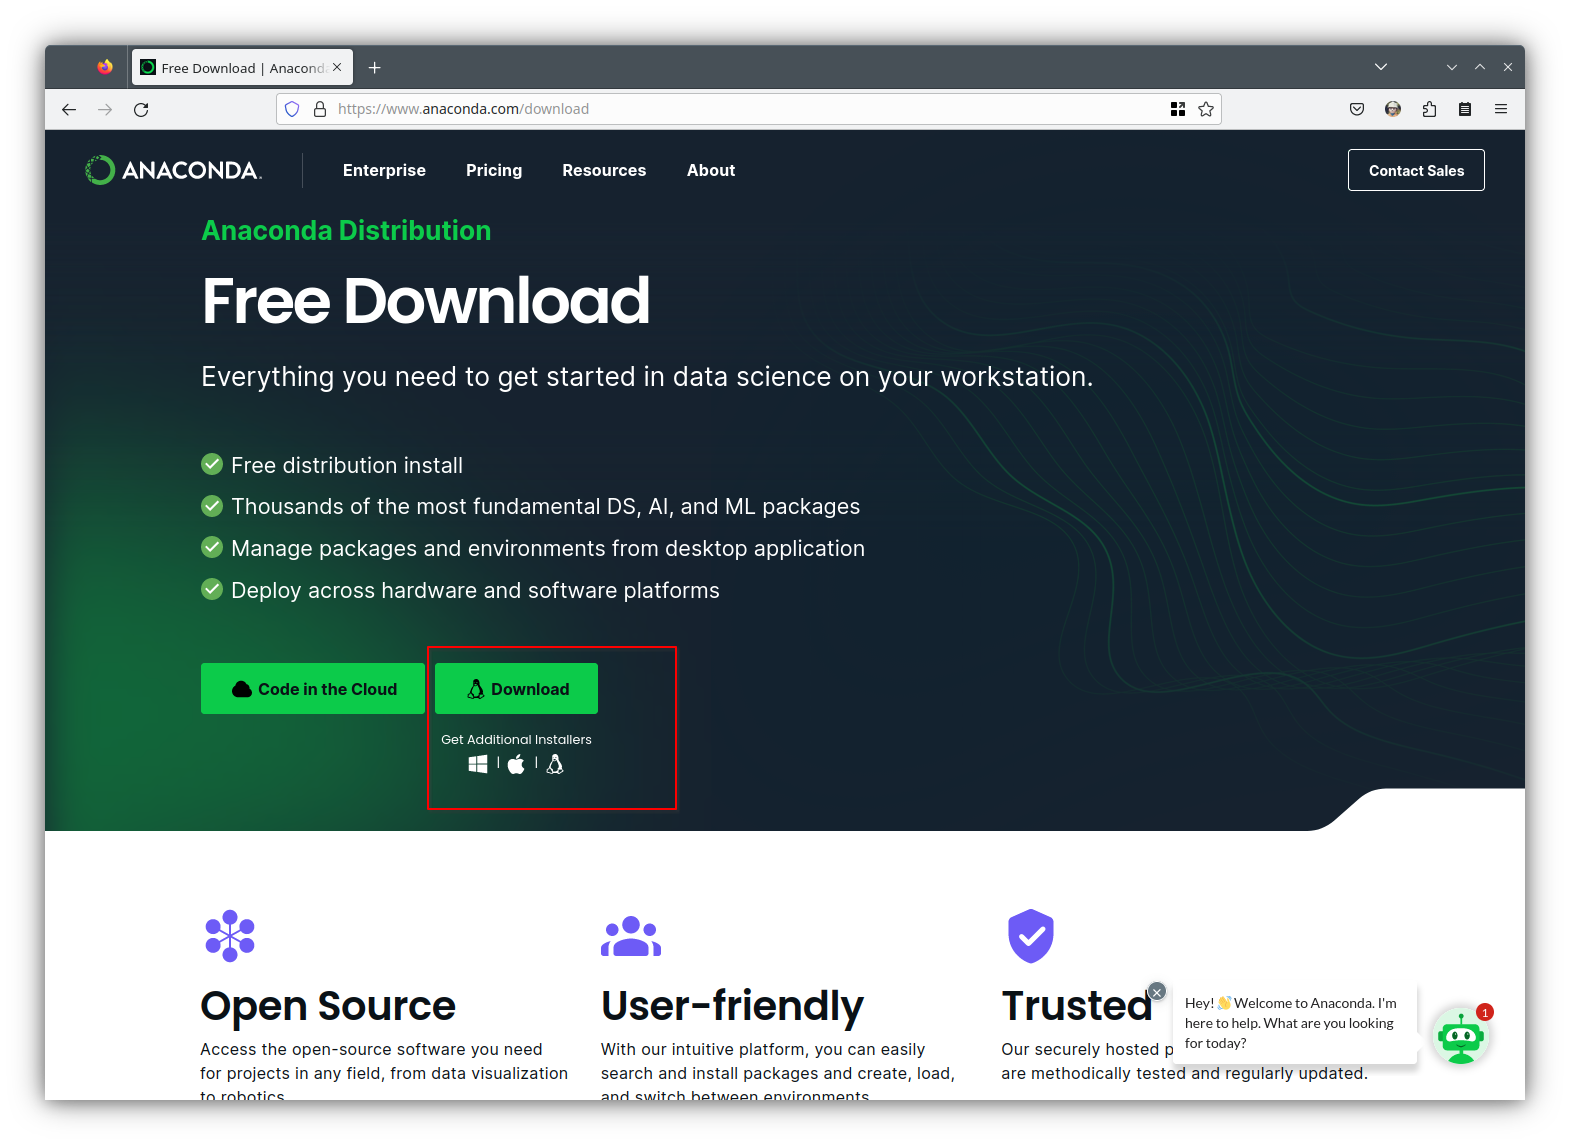
Once you’ve done it, Anaconda, Python, some popular libraries and a software called Anaconda Navigator will be installed in your system. We will be using Anaconda Navigator as an interface (GUI) to Anaconda.
A.2 Create a virtual environment
You will only need to do this step once per machine. After the virtual environment is created, you will not need to create it again, unless you delete it or you want to use it in a different machine.
- Download the file
environment.ymlin your laptop- Right click on
environment.ymland select “Save Link As…” - Create a folder dedicated to
IM939(where you will be adding your notebooks and exercises) and save it in there without changing its name.
- Right click on
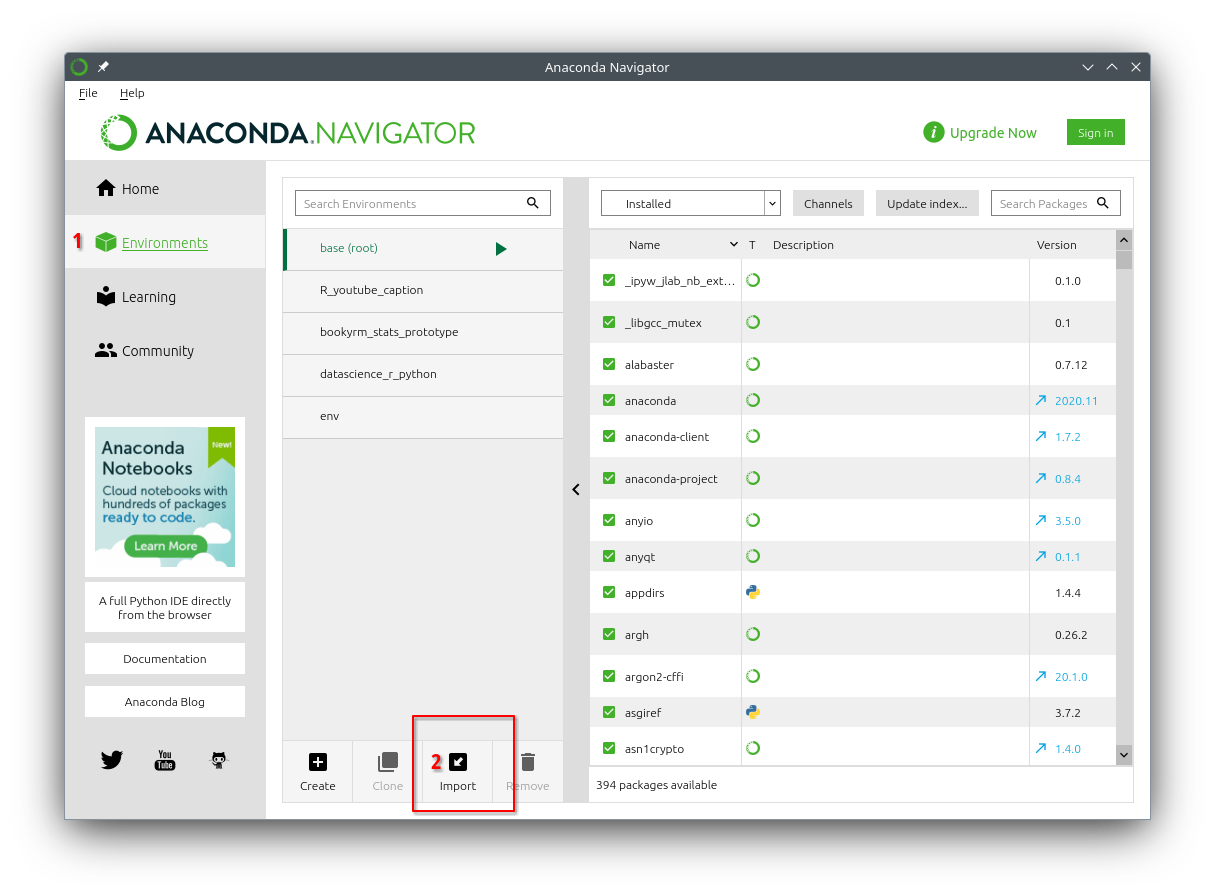
- Open Anaconda Navigator
- Click on Environments’ tab
- Click on Import
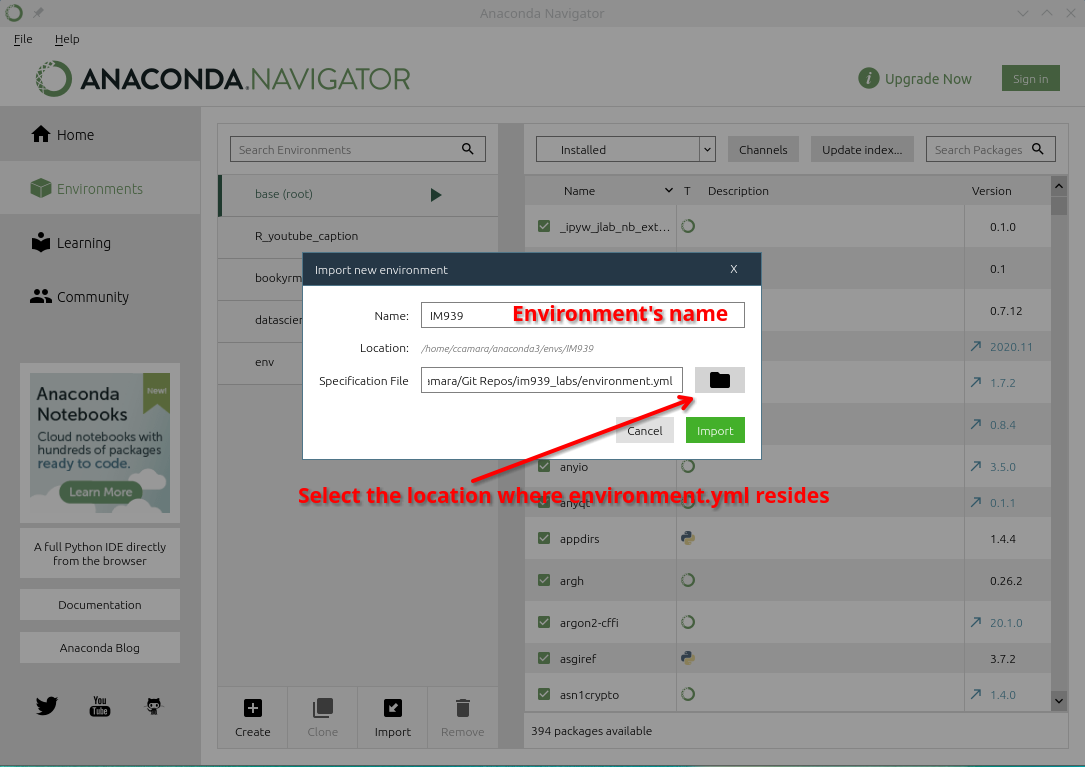
- Select the file
environment.ymlyou downloaded on the previous step. - Write
IM939as the environment’s name
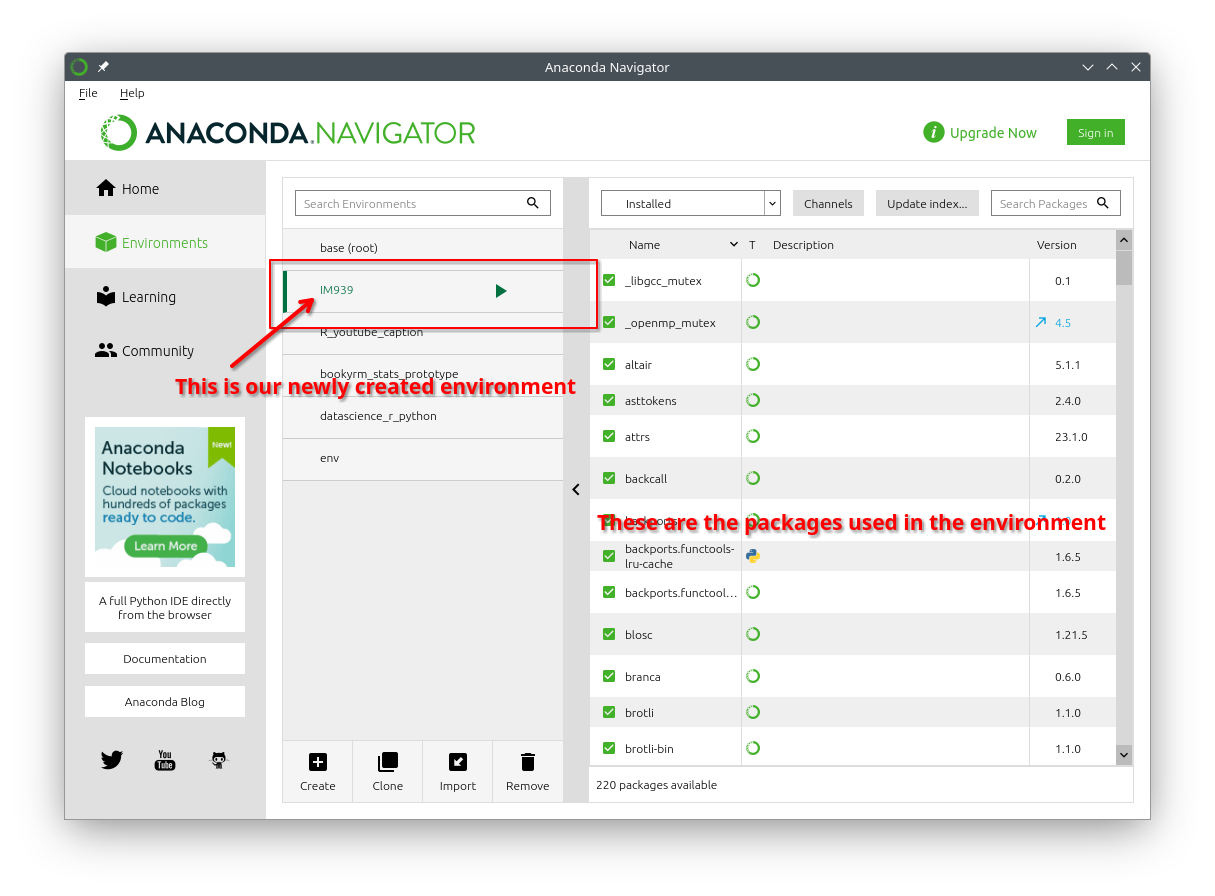
- After downloading the required packages and installing them (this can take time), an environment called
IM939will be created
Instead of using anaconda navigator, you can also do the same from the command line.
Open your terminal and type the following command:
Terminal
conda env create -f environment.ymlA.3 Activate the virtual environment
You will need to do this every time you restart your session. Prior to every lab session, you will need to make sure that the IM939 environment has been activated.
To activate an existing environment you need to:
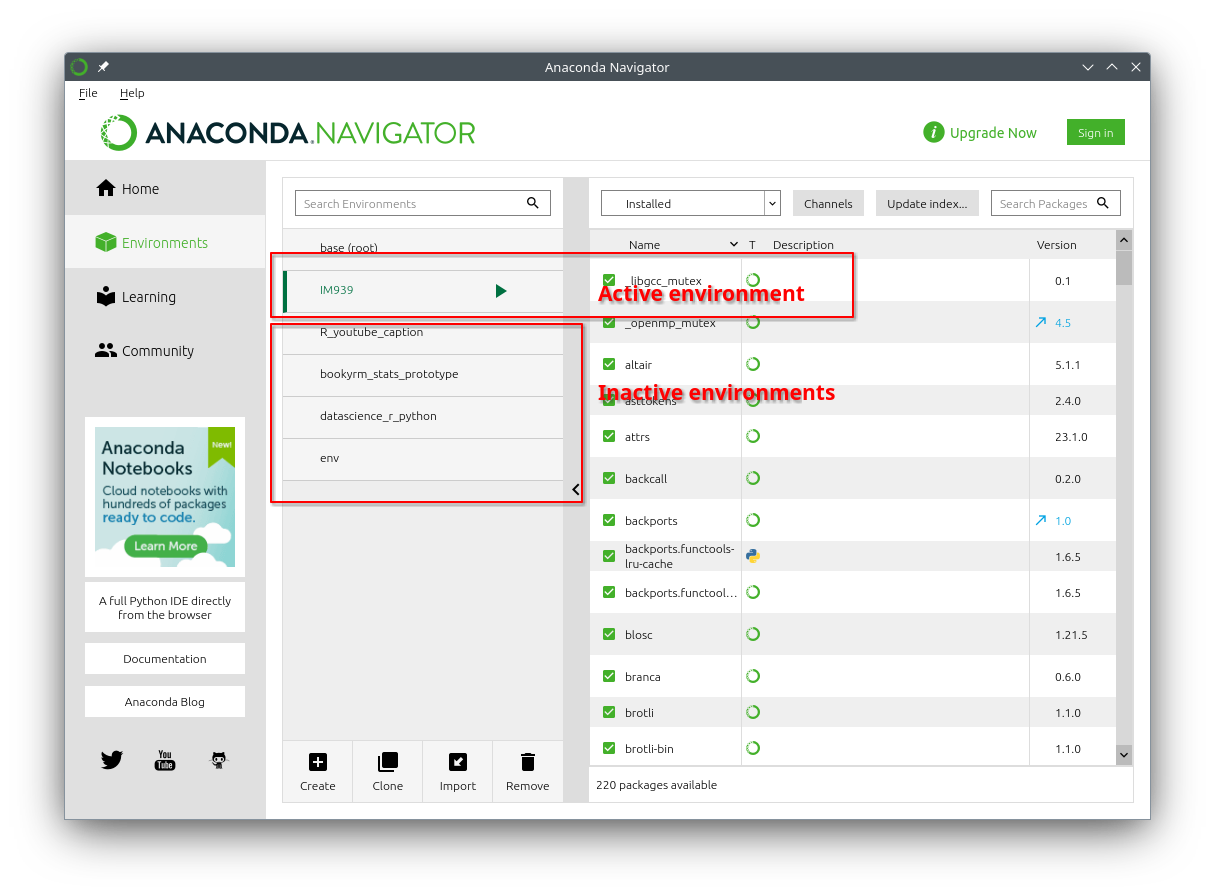
- Open Anaconda Navigator
- Click on Environments’ tab
- Click on
IM939to activate it. After a brief lapse of time, you will see a green border and arrow next to it, indicating that the environment has been activated.
Instead of using anaconda navigator, you can also do the same from the command line.
Open your terminal and type the following command:
Terminal
conda activate IM939You will see that the environment is active because you will see its name in the command line.
If you do not activate the environment, chances are that the code will not work due to missing libraries or using different versions of some libraries. Image below shows how the same command (import altar as alt) yields an error on Figure A.6 (a) because the environment has not been activated, whereas Figure A.6 (b) shows that the same code just works after activating the environment using the command conda activate IM939.
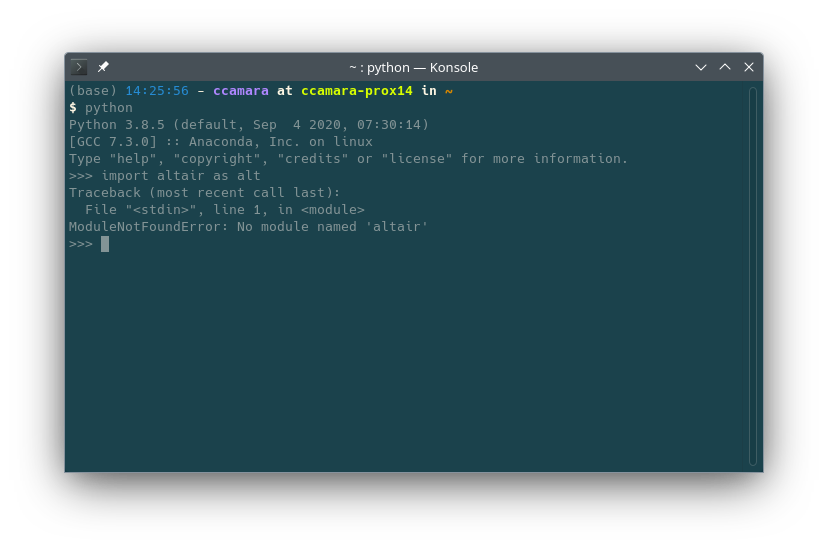
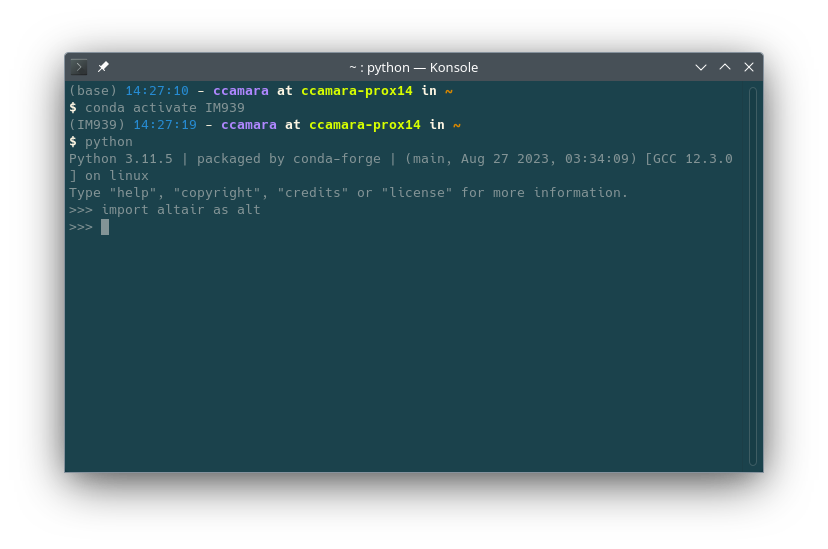
Did you notice that the terminal on Figure A.6 (a) shows (base) next to the command prompt, whereas Figure A.6 (b) shows (IM939) instead after having activated the environment?
You’ve guessed right: this is how the terminal will tell us which is our current environment.
A.4 Working as usual
Now that the environment has been created and activated, you can use your jupyter notebooks using your favourite IDE, like you would do normally. For your convenience, the environment includes Jupyter Lab (and some extensions).